Blog
How to Fix a Flat Tire on your Next Bicycle Tour
HOW TO PREPARE: An 8 part series to get you ready for your first TDA tour. Click here to read more.
If you are joining a supported cycling tour where you bring you own bike (such as the many tours we run around the world), there is a good chance that you will be expected to know how to change a flat tire. If you are solo cycle touring, then you definitely need to know.
During the Bamboo Road cycle tour this past fall, our expert mechanic Ryan took some time to walk us through the process in this handy how-to video (below). Ryan has been working on bikes for 12 years and figures he has fixed hundreds of flat tires in his lifetime. Here are three simple steps to fixing a flat:
You will need a few things to complete the job:
- tire levels
- new tube
- pump
- also handy: needle nose pliers and gloves
I suggest you watch our how-to video first, and then read the more detailed step by step instructions below.
Step 1: Remove the Tire
Find a space where you can either lay your bike down or turn it over to rest it on the handlebars and seat. Do your best to find a place shielded from the elements.
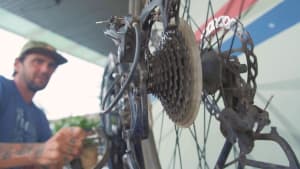 When repairing a flat on the rear wheel, shift the rear derailleur to the outermost gear on the cassette. This allows the wheel to be removed while the chain is under the least tension, and causing the least resistance.
For bicycles with rim brakes, release the brake so there is room for the tire to slide out past the brake assembly. Release the quick release. In the case of bikes with a thru axle or bolted axle, use the necessary allen key or wrench to loosen the bolt. Remove the wheel.
TIP: Wheel Terminology
Some terminology that people can get mixed up: ‘Rim’ is the metal hoop without the spokes, hub or tire. ‘Wheel’ refers to the whole assembly of the hub, spokes, and tire. ‘Tire’ refers to just the rubber outer tread (and not the tube, rim or entire wheel).
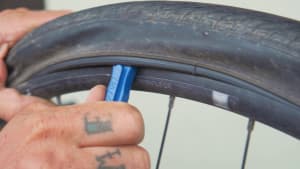 Next, deflate the inner tube and use your tire lever(s) to remove the tire. Be careful to avoid pinching the tube inside the tire. Run the lever along the inside of the tire slowly, continuing to adjust as you encounter resistance. The lever will help you lift the tire out of the rim and allow you to slide along the rim’s braking surface, pulling out the tire from inside the rim as you go.
With one side of the tire released from the rim, you can remove the inner tube. The opposite side of the tire can remain inside the rim to make reinstalling quicker.
Step 2: Find the Hole
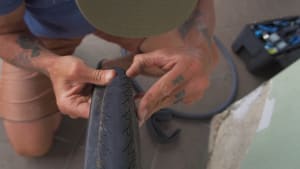
Using gloves or a cloth (or carefully without gloves) run your fingers along the inside and outside of the tire. While you are doing this, you should also be looking closely at the tread to see if you spot any pieces or wire, glass and feel for any bumps or gashes.
You will be surprised how small the culprit can be. The smallest shard of glass can be picked up on your ride and slowly over many many kilometres work its way into the soft rubber tire and eventually pierce the tube.
TIP: Find the Cause
The most common cause of a flat tire is the previous flat tire – meaning that the same piece of glass or wire was never found and removed. After you repair the flat the same sharp object simply works its way into a new tube. So make sure to do a thorough check of your tire. Taking an extra 5-10 minutes to fix this flat could save you from fixing another one further down the road.
Sometimes you won’t ever find the source of the puncture. The wire or nail may have not remained in the tire or fallen out as you started fixing the flat. But once you are satisfied that the tire is free of debris and sharp objects, its time to put in a new tube.
Step 3: Repair the Flat
Take out a fresh tube and inflate it just enough to give the tube form, making it easier to position it inside the tire. Put the valve through the valve hole making sure it sits straight up and down, perpendicular to the rim.
TIP: Use a New Tube on the Roadside
On the roadside, get yourself riding as soon as possible by putting a new tube in and carry the damaged tube with you to be repaired later. Once you arrive at the end of your ride, you can take the extra time to patch the damaged tube. You can do this in your tent or hotel room, out of the elements to ensure you have created a good seal.
Seat the tube inside the tire, making sure it isn’t pinched or folded. Start putting the tire back onto the rim at the valve, and work your way around the rim from there.
TIP: Avoid Tire Levers
Try not to use levers for putting the tire back onto the rim. You are likely to pinch the tube against the rim when doing this. Use tire levers only as a last resort (in the same orientation used when removing the tire).
You might want to hold the wheel against your midsection with the valve side at the farthest point away from you. With both hands, work your way from the valve on either side pushing the tire onto the rim. Pushing the last few centimetres of the tire into the rim requires more force, so you could place the wheel on the ground, standing on the opposite side and rolling the remaining tire towards you.
TIP: Set Tire in Deepest Part of the Rim
If it won’t budge, try adjusting the tire inside the rim so that it is sitting in the centre of the rim channel all the way around. The centre is the deepest part, so this means the tire should more easily stretch over the final few centimetres.
Now that it’s on, visually inspect it to make sure the tire is sitting evenly inside the rim. Inflate the tire partway, than re-inspect the rim to ensure the tire sits evenly all the way around and on both sides. Continue inflating to the desired pressure.
TIP: Tire Pressure
You shouldn’t always inflate to the maximum pressure. Instead it should be inflated to an appropriate pressure based on the terrain you’ll be riding (softer for unpaved, rough roads for example).
Put the wheel back on the bike. Tighten the quick releases or bolts. Spin the wheel to double check that its seated properly in the dropouts.
Then you are good to go!
Was this useful? Many of us have our own tips and tricks, so please share yours in the comments below.
A special thanks to our mechanic Ryan, narrator Sophie, and videographer Esen.
How to Prepare
An 8 part series to get you ready for your first TDA tour. Click here to read more.


6 Comments for "How to Fix a Flat Tire on your Next Bicycle Tour"
Along with all that, before replacing, or refitting, the tube, I also inflate the tube slightly, so as to reduce the possibility of a pinch puncture.
good point, thanks for adding that detail.
What about tubeless tires?
We don’t recommend tubeless tires for the majority of touring cyclists due to the more complicated and finnicky setup, and difficulty of carrying the needed tools and supplies. However, for those who are very experienced with tubeless tire setup and maintenance, they can be a good option.
My tubeless road bike is losing air from the valve have tried to pump more air but keeps losing. What is wrong with the valve please.
Hi Stanley,
It really is hard to say without seeing the bike. Your best bet would be to visit a local bike shop.